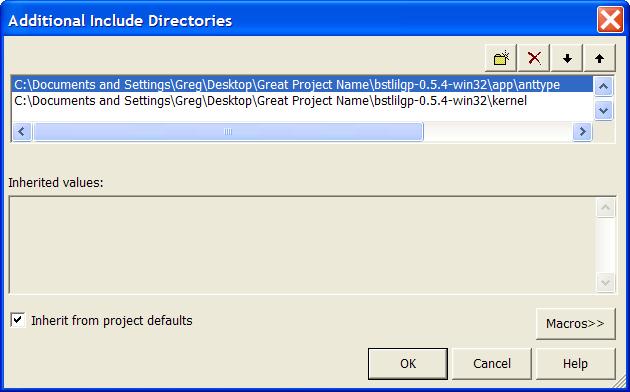
 icon to add a new directory entry in the frame below, then click the ellipses (...) button to set this entry to a directory.
 Hi! I'm Troy McClure. You might remember me from such HOWTOs as tifflib tutorial or this other link to tifflib tutorial
You're reading this because you want to compile and run the Brock Strongly Typed lilGP using Visual Studio .NET
Download bstlilgp-0.5.4-win32.zip.
To begin, let's create a new project in VS.NET
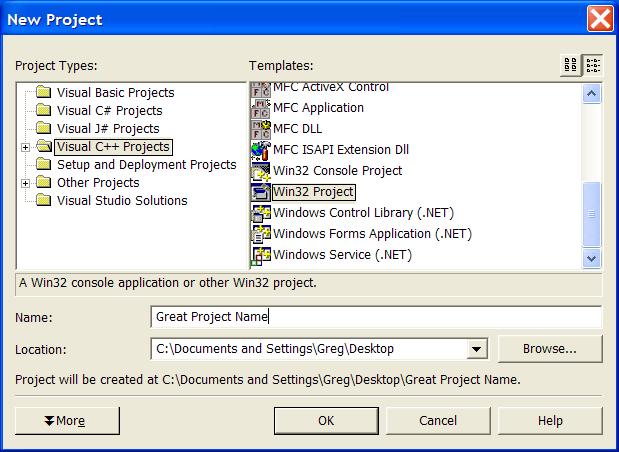
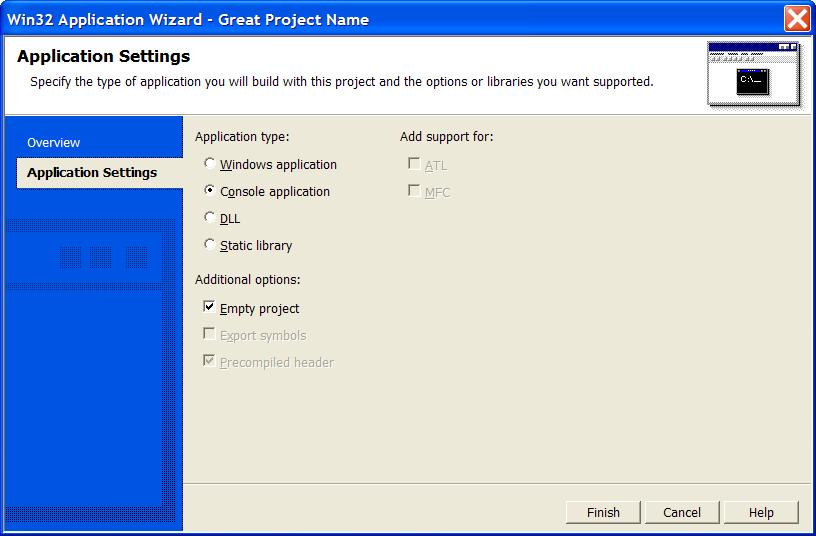
Be sure to change the Application Settings during the creation process. We want a Console Application, and we want it to create an Empty Project
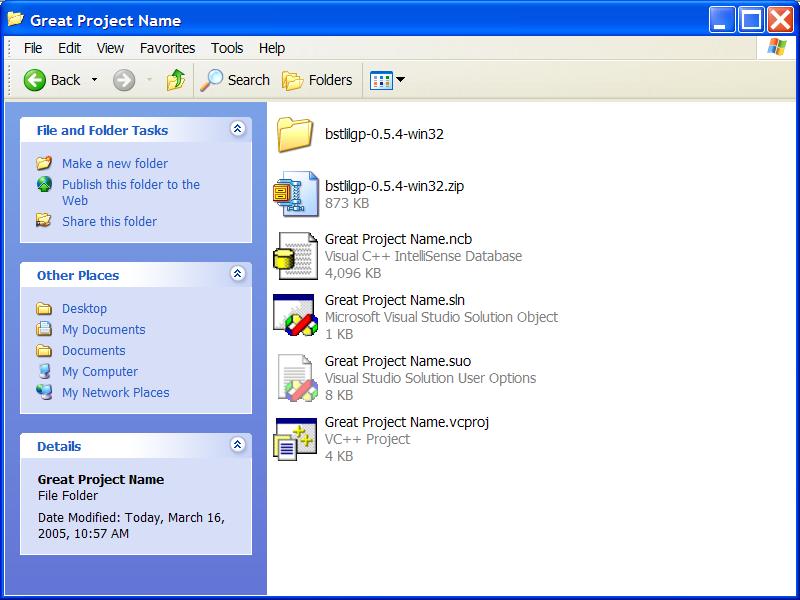
Next, we need the lilgp source (Available here). Save & Extract it to your project directory.
To keep things tidy, let's create some directories in our project by right clicking and choosing "Add -> New Folder"
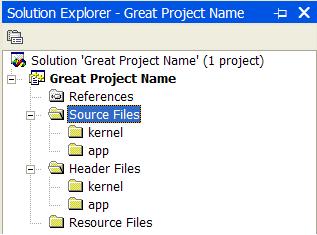
The next step is to add the kernel source files (*.c, not header .h files) to the project. These should go into the Sources Files -> kernel directory we created previously. You can add files by right clicking the directory and choosing Add->Existing Item
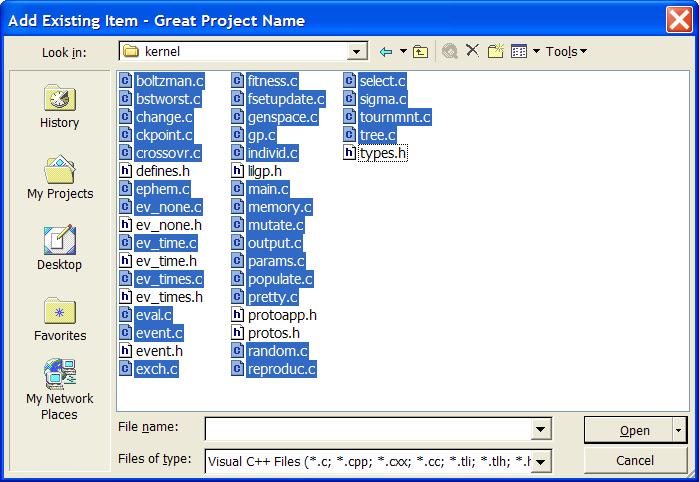
Now that we've added the kernel source, let's add the kernel headers by following the same procedure, except adding .h files only, and into the Header Files->kernel directory.
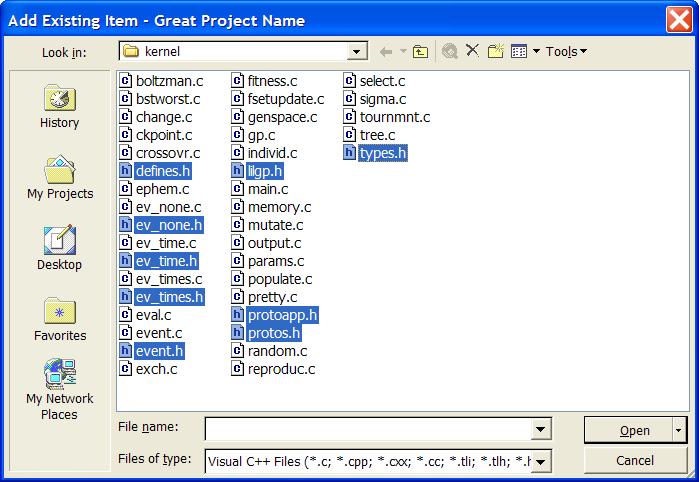
There are some redundant files in the kernel to account for various types of timing on various operating systems. ev_none, ev_time, ev_times and event are different methods of timing, but we only need one of them. Let's use ev_time since it works. We need to remove the redundant files from both the kernel source and kernel header directories. So remove the files ev_none.c, ev_times.c and event.c from the source and remove ev_none.h, ev_times.h and event.h from the headers.
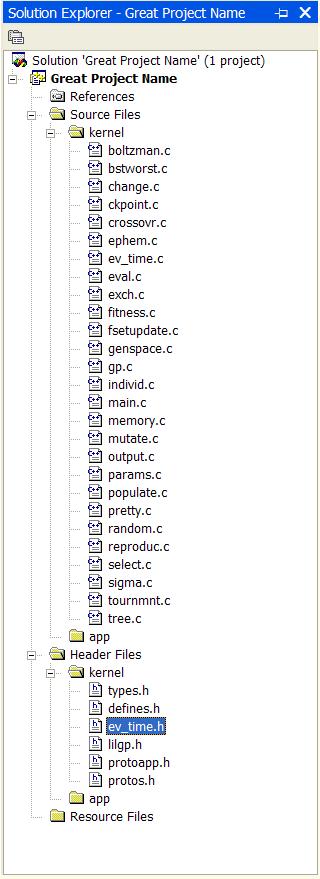
The project should resemble the following image, after removing these redundant files.
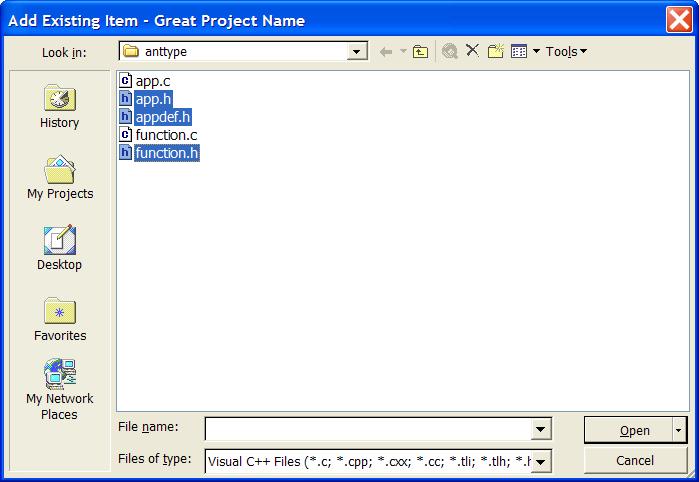
Now that the kernel is in the project, it's time to add the app. I'm going to use anttype in this example.
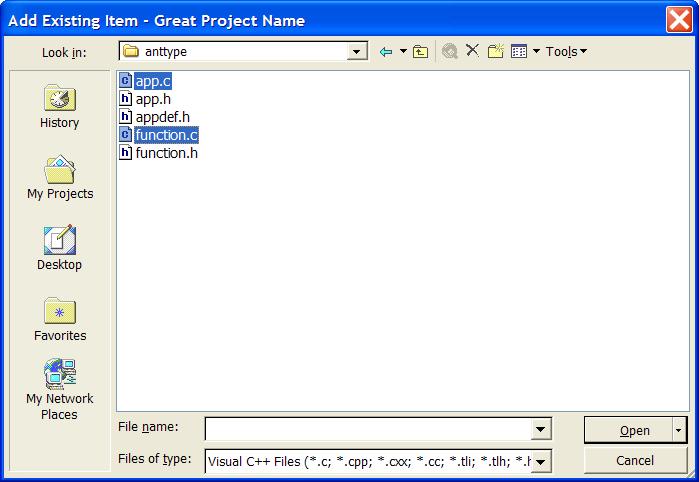
Similarly, we must add the app's header files as well
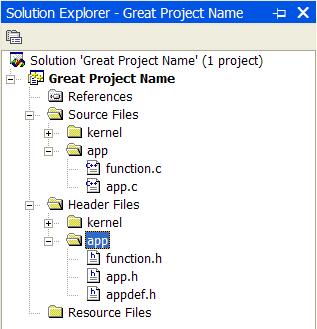
Now, the app directories should look something like this:
Next, we need to add the include directories to the project so that it knows where to find header files.
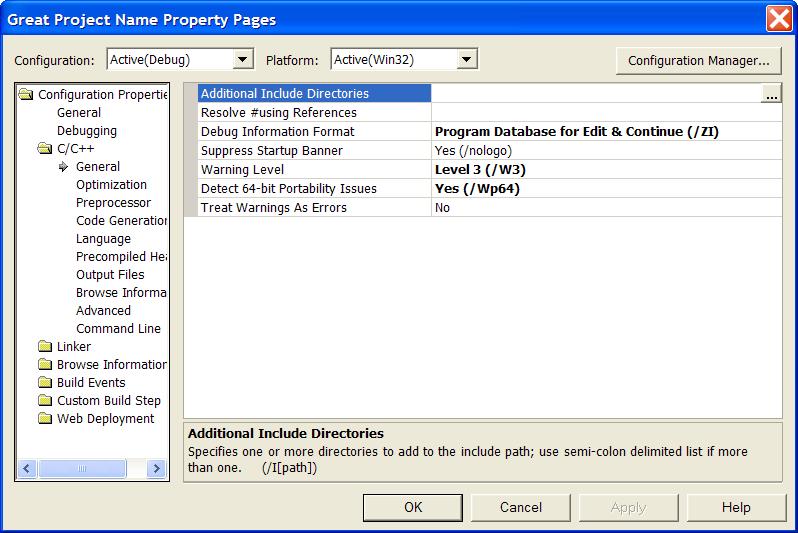
There are two include directories, both within the bst-lilgp subdirectory. These are the directories kernel and app/anttask (or whatever app subdirectory you are using). To add directories, click the ellipses (...) button and a new window will open.

Now click the icon to add a new directory entry in the frame below, then click the ellipses (...) button to set this entry to a directory.

When both include directories are added, your window should look similar to this:
Now click OK, and again OK on the project settings window and you will be back to the main VS.NET window.
The project will actually compile and run now, albeit with a metric crapton of warnings.
However, running it at this stage will not produce any output, as it requires command line arguments indicating, at the very least, the parameter file. The project also needs to know where to find the files you specify (the working directory).
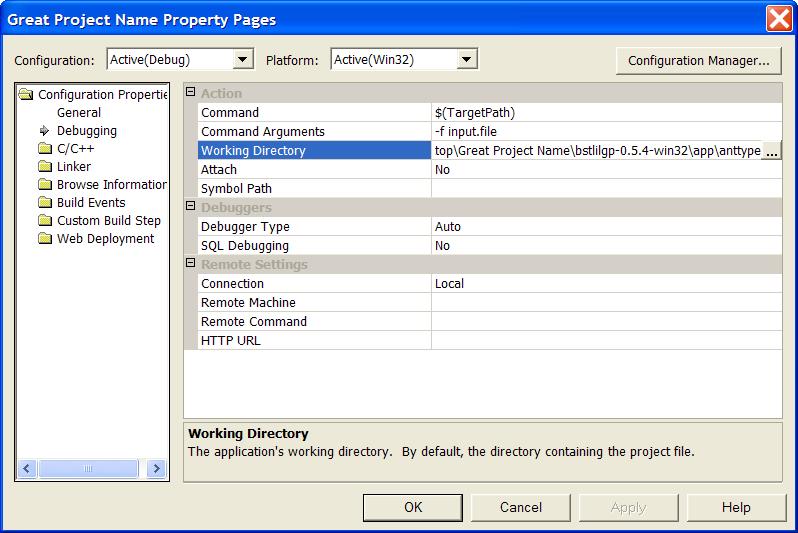
In order to add command line arguments, open the project settings window and select Debugging from the left hand menu. Now add your command line arguments to the Command Arguments field. Next, set the Working Directory field to the app you are using (I'm using anttask). The final project settings should resemble the following:
Now click OK, and run your program.