This setup targets Microsoft Visual Studio .NET 2008 but the steps will be similar for other versions.
Note: In Microsoft Visual Studio 2005 the paths to copy the libraries to were C:\Program Files\Microsoft Visual Studio 9\VC\PlatformSDK\Lib and C:\Program Files\Microsoft Visual Studio 9\VC\PlatformSDK\Include.
The OpenGL Utility Toolkit (GLUT) can be downloaded from the Course Website. Download the file freeglut-X.X.X.zip where X.X.X is the latest version available. Extract its contents and copy the following files to these locations:
FreeImage can be downloaded from the Course Website. Download the latest FreeImage DLL (i.e. FreeImage-3_15_3.zip). Extract its contents to a folder and copy the following files to these locations:
| Visual Studio 2008 | Visual Studio 9 |
| Visual Studio 2010 | Visual Studio 10 |
| Visual Studio 2012 | Visual Studio 11 |
Hence if you are using -say- Visual Studio 2012, the library files (*.lib) must be copied to C:\Program Files(x86)\Microsoft Visual Studio 11\VC\Lib and the header files (*.h) must be copied to C:\Program Files(x86)\Microsoft Visual Studio 11\VC\Include
Note: Be sure to create a Win32 Console Application and check off "Empty project" when creating a new project
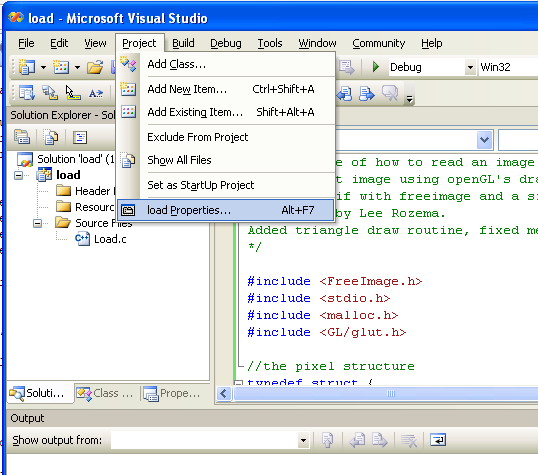
In your project (existing / newly created), navigate to the project properties by clicking on Project > "name" Properties
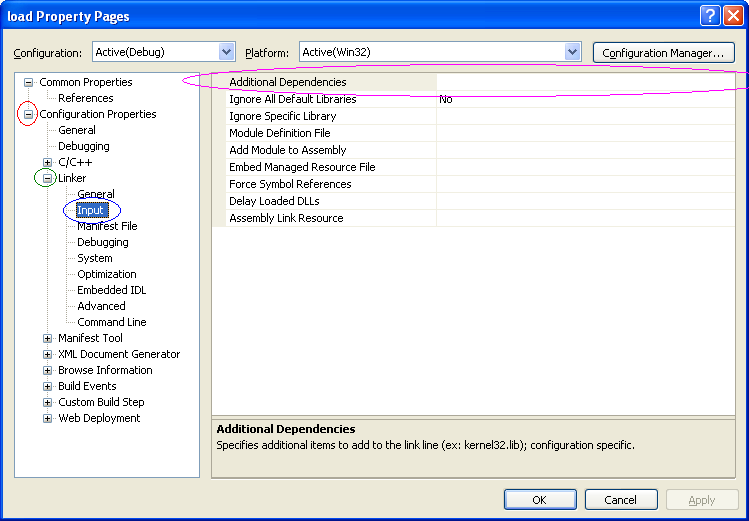
Navigate to Configuration Properties > Linker > Input. Click in the box for Additional Dependencies and enter the text for the following libraries to be compiled into your application:
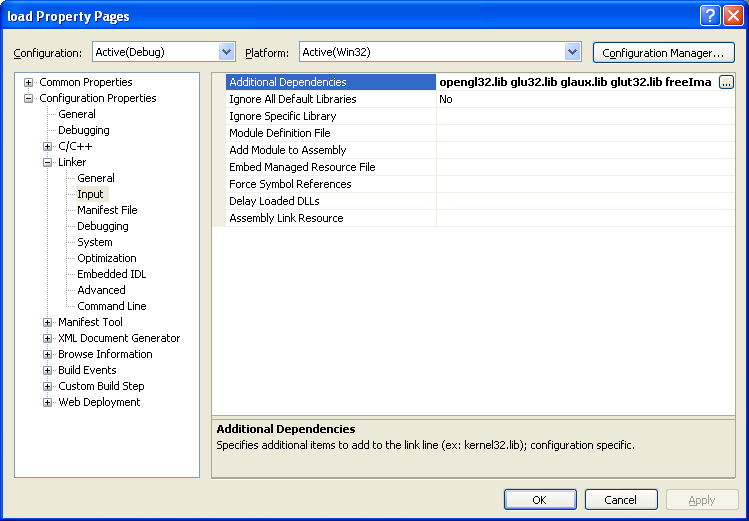
Click OK and you should be able to use Glut and FreeImage in your application. This will need to be done in each new project that uses Glut and FreeImage. To run the Load.c example program you will need to copy or create img.tif in the project folder name/name (for example if your project name is load then you would place the file in the load subdirectory within the load project directory). New image and text files created by your program will be placed in this same folder as img.tif.