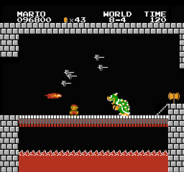
As a fan of video games and its legacy I wanted to do something special with a video game series I have played for my whole life, Super Mario. 2020 commemorated the 35th anniversary for the italian plumber. Thus, I decided to make an animation depicting a fight between Mario's long standing rival, Bowser. I wanted to recreate the original fight in the first Super Mario Bros. game with a more cinematic approach.
I chose Blender because I played around with it personally many times but couldn’t get around to make something myself. Never done 3D animation and I heard Blender improved a lot with 3.0 so I was excited to try. After Effects was something I used a lot ever since back in High School so using that to assemble all the frames and audio clips was the most comfortable to me. Audacity is also something I am familiar with. However, I didn’t expect to use it much as I didn’t think I would need to record any audio.
Before figuring out how I was going to animate the fight sequence I needed to either create a model or find a suitable model. I am not an artist, I am a programmer for that reason. This doesn't mean I couldn't create a model, it just would take 6 months to make an adequate model. Time I do not have. I went around the internet to find models but wasn’t pleased with the results. They either cost way too much or they had 2 different styles that didn’t look good together. At that moment, I remembered that hackers love to pull out all the content from video games including models. The models came from www.models-resource.com from the game Super Smash Bros Ultimate. All rights to the models and characters are from Nintendo, their use for this context is for educational purposes only.
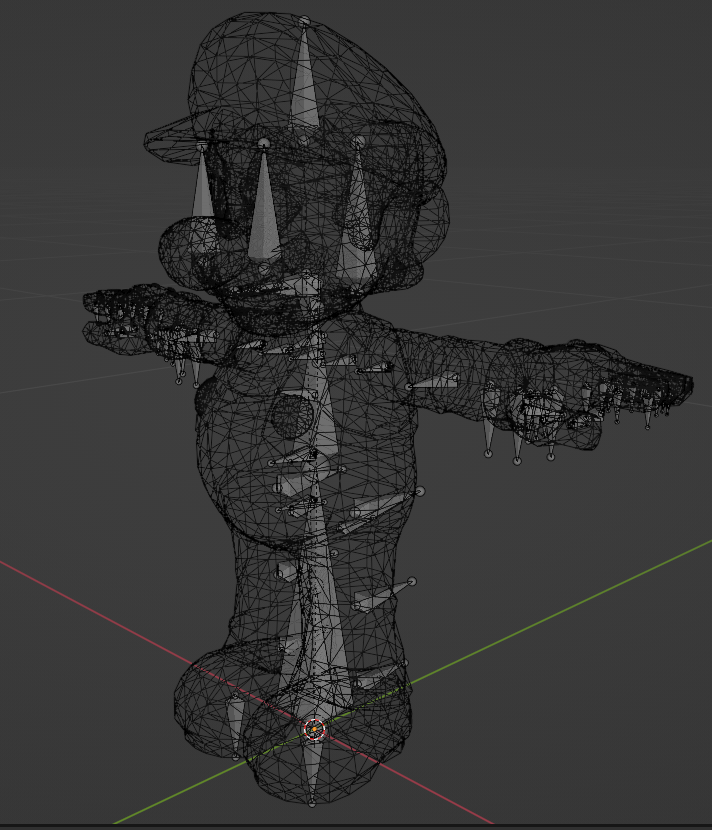
The benefits of using these models where they were high quality, had proper UV wrapped meshes and materials set. This increased the amount of time I could animate instead. However, I ran into a couple of issues during import. Blender has a material view that makes it easier to see how models look before lighting is applied. This makes animating a lot easier than the solid view (uniform colour on the whole model) as it is easier to see any glaring inconsistencies like eyes since the eyes are textures. Unfortunately, the import broke the materials in such a way that it looked like the mesh normals were inverted. I could see Mario’s back from the front and his front from the back. After 2 days of troubleshooting I decided to remake the materials and this gave me a better opportunity to rename all the textures and materials and meshes to what made sense to me.
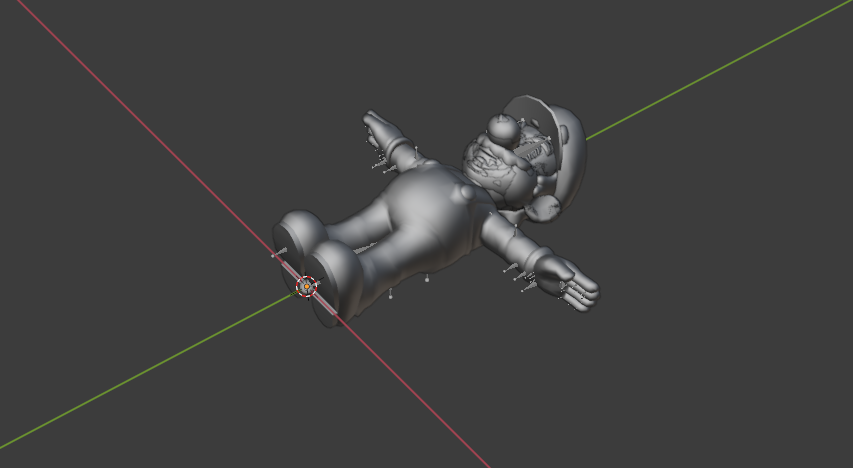
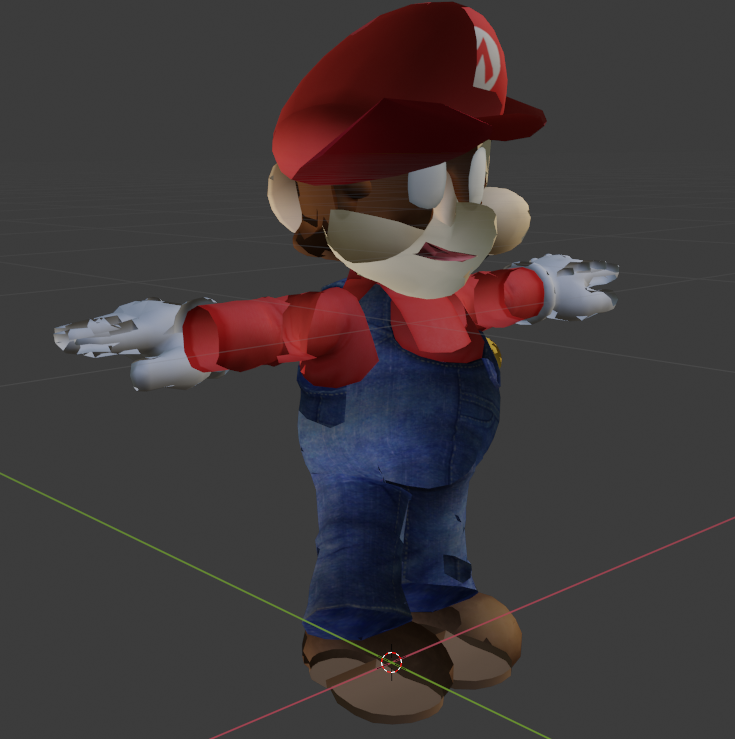
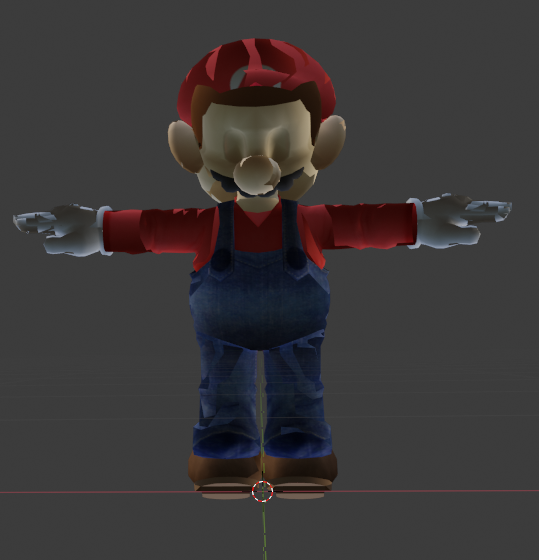
The import also broke the character rig. A character rig helps animate the character model into poses rather than moving individual vertices. This is especially helpful for complex geometry with thousands of vertices. The rig was semi-functional but many of the bone placements were unintuitive so I deleted it and started from scratch. Starting the character rig also helped me to set up inverse kinematics on the model. By default rigs operate using forward kinematics meaning, when you move the parent bone the children move with it. For example, If I move the upper arm into a certain position the rest of the bones like the hand follow. This is fine and works but it would be nice if the reverse were to happen. If I move Mario’s foot into the air the knee should bend appropriately. That is why inverse kinematics is very useful to help with the animation process. After recreating the rig, I automatically assigned it as the parent with the model. With some adjustments moving the rig moves the correct parts of the model.
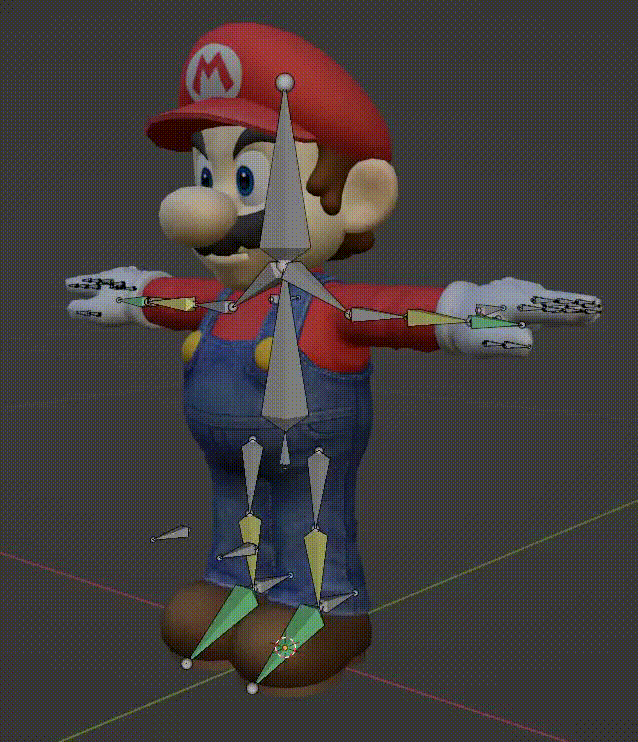
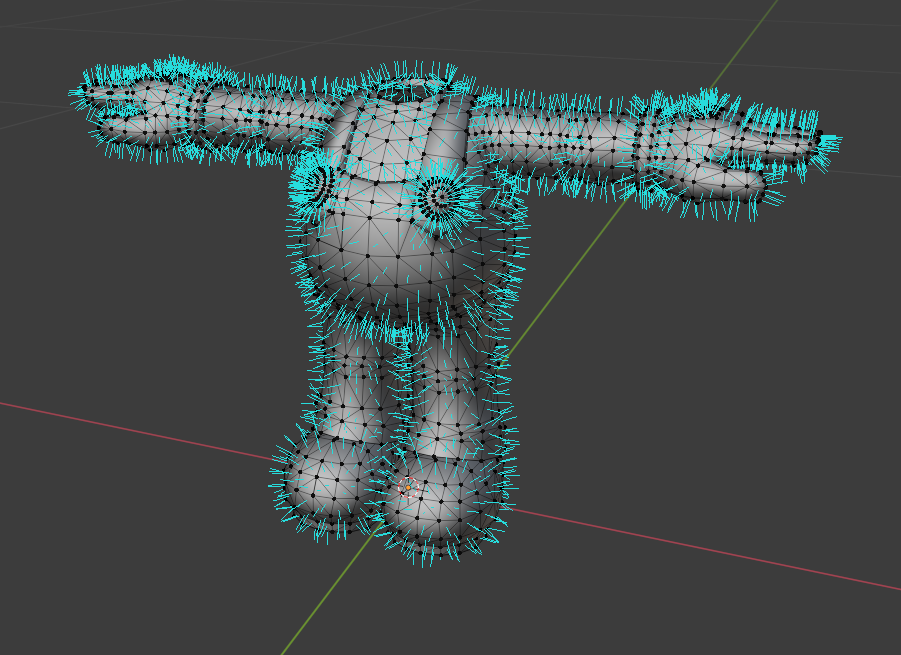
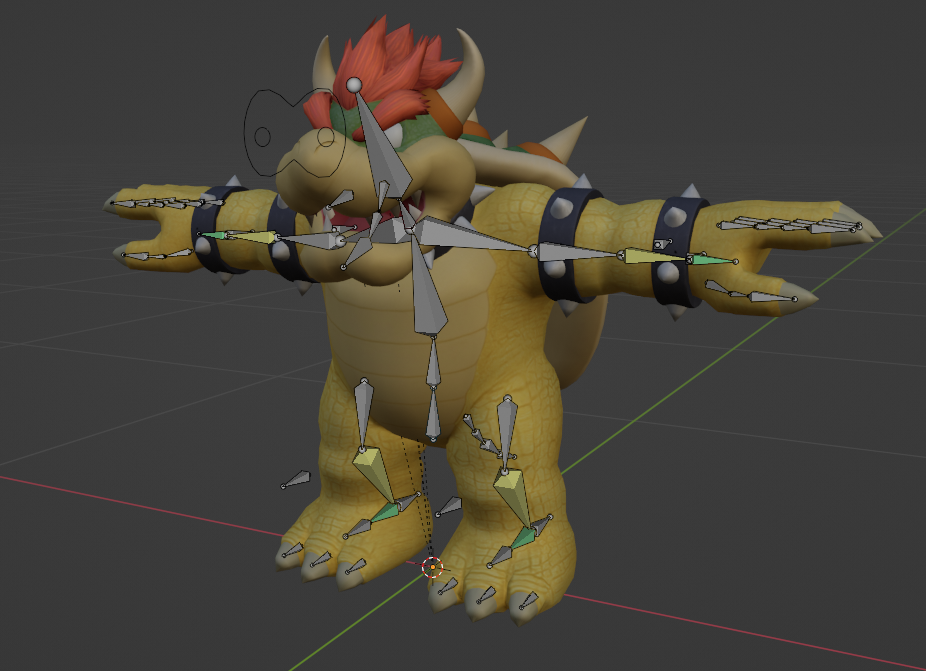
Blender uses weights on each vertex to determine what bone affects said vertex and by what amount. This caused issues like the moustache where Blender determined that part of the mesh should be controlled by the torso. Thus I had to do this manually with Blender’s weight paint mode. This process was easily the most tedious. Painstakingly painting the mesh for each bone and not having the ability to mirror my weight paint was not fun. To make things worse some of the bends still didn’t look right so I had to add more bones to compensate for this. In the end I was able to get the model working like I wanted. Eyes were rigged to a controller that doesn’t work like other parts of the body. The controller simply warps where the UV texture is wrapped around the mesh. Basically, the mesh stays in the same place in 3D space the texture moves instead. Using everything I learned from rigging Mario, I was able to rig Bowser much faster and not much differed other than the tail.
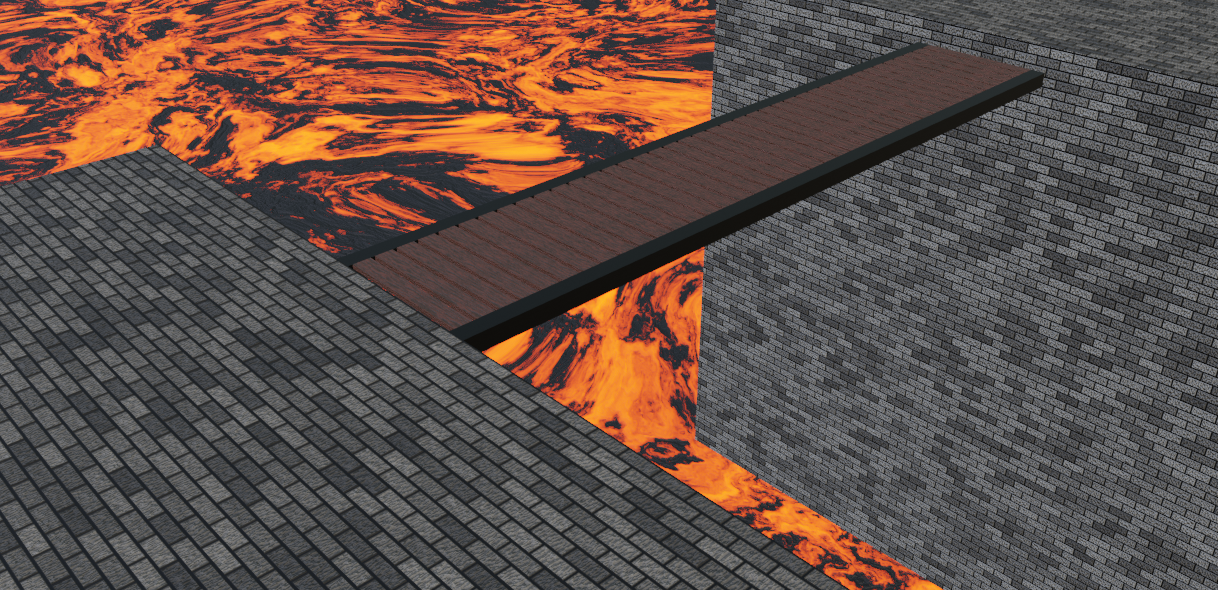
An animation needs a setting to animate the characters otherwise it wouldn't be as engaging to the viewer. Thus, I needed to recreate the bridge from Super Mario Bros. I didn’t want to make the geometry complex. As I was using high resolution models, I already had a sense that my render times would take even longer with a high detailed scene. So I stuck to simple: 2 cuboids to represent the platforms on each end of the bridge, rails and boards, and finally a plane to represent magma. I didn’t use any reference images other than the first game I just modelled what felt right. Once that was done it was on to the materials.
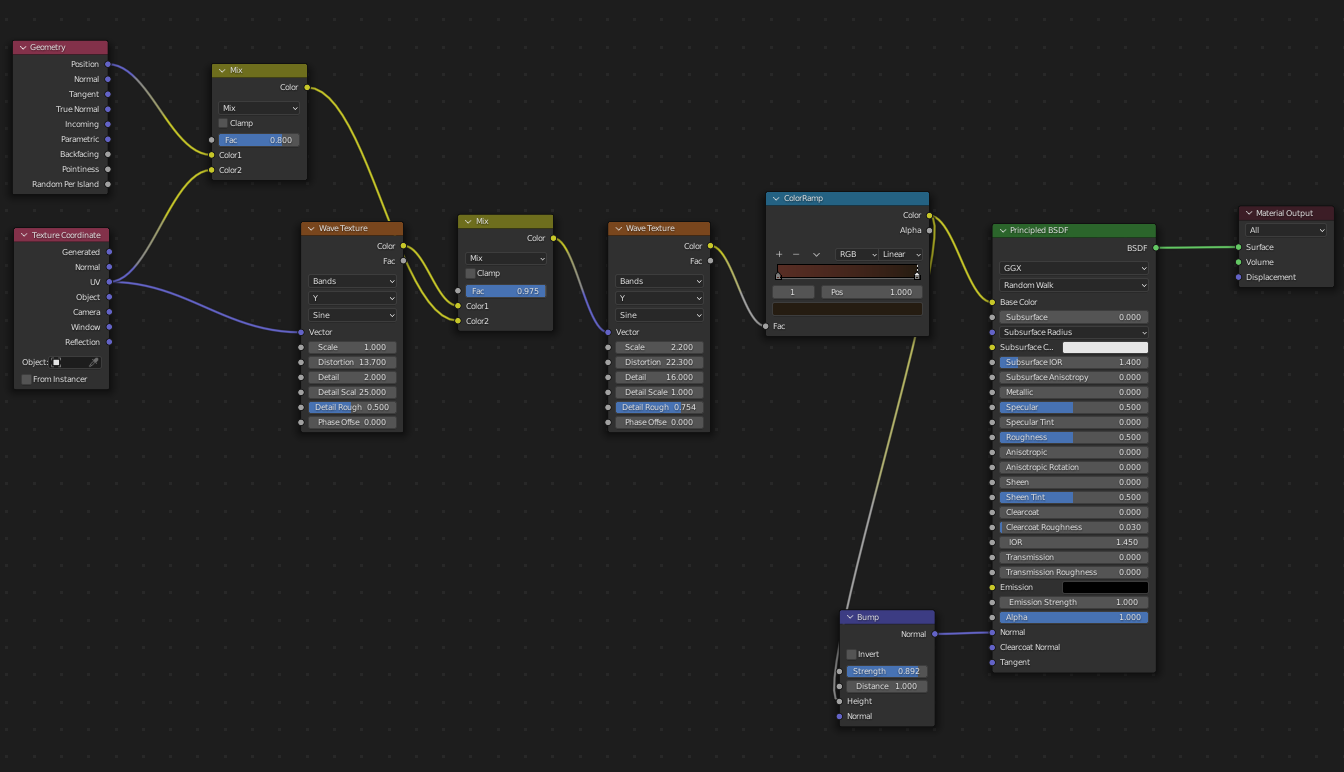
I’ll be honest, in all the times I’ve used blender I never liked finding materials. First, I could never afford them especially since I wasn’t making any money on my projects and second, I was never good at making textures from scratch or taking pictures of my own textures. So this time I decided to learn how to make procedural textures within blender. Blender has some basic textures for bricks, wave, and noise. Using these base textures I could alter them to get the desired effects I want. I used a double wave texture on the wood for the boards, This helped create the banding you see on cut lumber to give it that authentic look then using a ColorRamp which maps black and white values to a gradient of a dark brown to a light brown and voila, wood. The platforms use the basic brick material didn’t need to change much. I added noise and then used that to create a normal map to give it a slight bump. It isn’t deforming the mesh because that would require more vertices and resources and time I don’t have. So I was happy with the results. The Lava/Magma material I created was a lot more interesting. It is actually a mixture of 2 shaders, an emission shader for the bright orange parts and a regular noise shader for the rock. These 2 shaders were mixed together with a noise texture using a color ramp to perfectly half what is rock vs. lava and at the same time maintain randomness. The final result is what you see below.
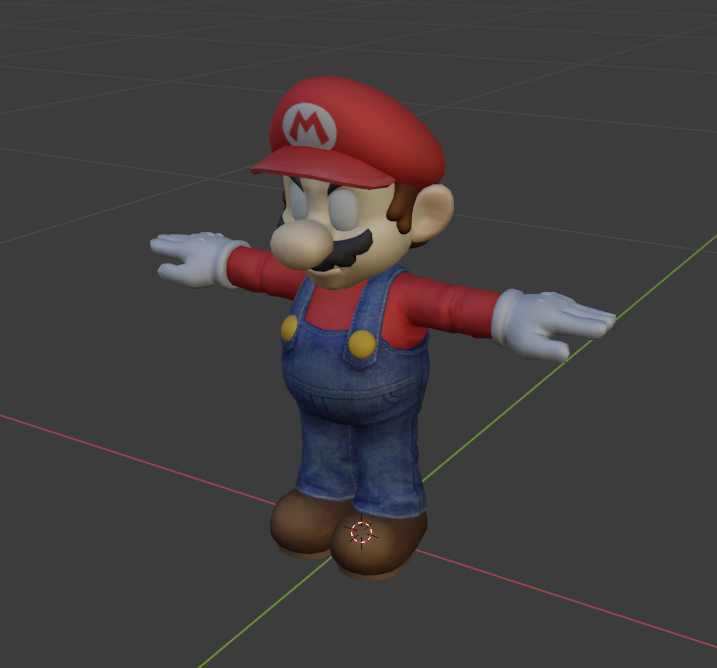
Now it was finally time to animate. I created a new scene and simply imported all the models that way I maintained all three models if anything bad happened. I did have to adjust the character model scales as they were way too small but luckily scaling them didn’t break their rigs at all. If you couldn’t tell already I can be a bit ambitious for my skill level (A little too much) so I already had an idea of a lot of shots I wanted, sadly a lot of them missed the cut. I had to rethink a ton of times during this process even redoing a shot because it just looked bad. Rigging made things easier yet hard at the same time. Mario’s hands were easily the hardest because the inverse kinematics moved the bones to the right position but the hand orientation had to constantly be readjusted. If I moved Mario's hips his feet and hands wouldn’t so they had to constantly be adjusted and the list goes on. Most importantly no animation on characters especially makes them look stiff to an unnatural degree. I did my best to combat this but it is inevitable with my skill level. Overall, I don’t think I did bad being my first time 3D animating.
I wanted to make this subject as to address the elephant in the room. The fire simulation at the end was not what I desired. Out of all the shots I cut I really wanted this to work. Before even getting models I wanted to do a shot of Bowser breathing fire as I thought it would be really cool to play with a physics simulation. Simulations are not easy. They take alot of time and effort to perfect and in this case I think it could have been better. I just couldn't get the smoke to cooperate with the fire. This made the fire look extremely flat and low quality. Baking takes incredibly long and I was left so frustrated I didn't even bother animating the last frame. It was a harsh lesson to learn. Maybe eventually I'll get my fluid simulations to look great like those tutorials. But for now I believe I still did a good job on how the particles emit and interact with the walls of the platform. Extremely time consuming but very educational experience.
I didn’t do anything revolutionary with the lighting, just simply added light to sections that made sense. Since I was using cycles the light coming from the lava helped establish the scene then I used an extra point light in the direction the shadows hit the hardest to reveal the character better. I tried doing a 3 point lighting setup using a key light, fill light and rim light however, it made the images look over exposed and didn’t look natural with the scene.
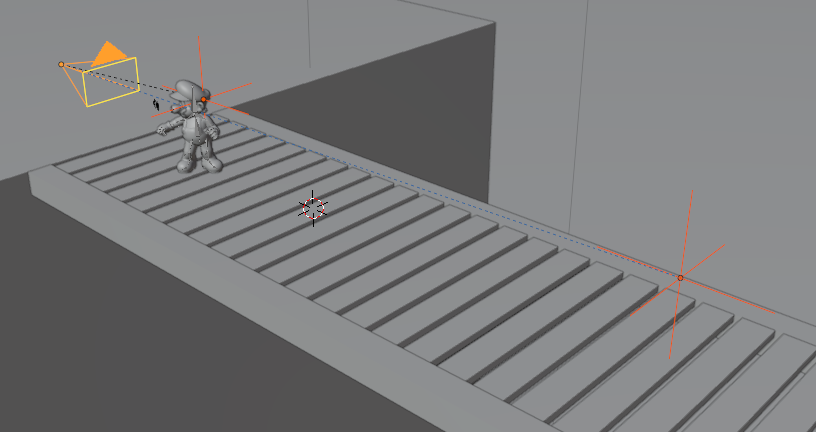
At first I considered using multiple cameras for each shot. Using Blender in the past I found moving the camera cumbersome and at some points infuriating. I decided to go for a different approach instead. While doing research I learned about Blender NULLs objects that don't have any geometry and won't show up in renders. They just show up as axes so I used that to my advantage. 1 Camera and 2 NULLs, Depth of Field(DOF) and CameraLook. The camera had a constraint to always track CameraLook. This way I can move the camera wherever in the scene I wanted and it would always be angled towards CameraLook. This makes panning very easy. As seen in the shot of the entire bridge. DOF served as the Camera’s focus. Normally in blender DOF is determined by the object you select. In order to change that you would have to keyframe the current object of focus then the next object of focus. This just made it simpler to just tell the DOF object to move from one section of the world to another without the requirements of an object present. DOF was parented to the camera so wherever the camera moved the DOF remained at the same distance from the camera.
My workflow for this animation was fairly straightforward with only a few days left and little room for error. In my possession I have 2 computing devices to run blender, My desktop PC I built back in high school with an i5 6500, 16 GB of DDR4 RAM and an MSI R9 380. This PC has dual boot Windows 10 and Manjaro Linux for Gaming mostly but also originally geared for game development. The other device being my Dell XPS 13 i5-8300H with 8 GB of DDR4 RAM also running Manjaro that I daily drive for school ever since I started university. Looking at the specs alone it would make more sense to run everything from my desktop alone but that was unfortunately not the case. With Blender 3.0 along with the massive improvements with render times, they also removed support for the OpenCL driver that previously allowed Blender to use my R9 380 as it was unstable. They are making a new driver to support older AMD cards but for the time of this project that solution wasn’t available and I had no plans on purchasing a new card let alone afford the cost and troubleshooting if something went wrong. During my tests, it was actually faster rendering a frame in cycles on my laptop in Blender 3.0 (52s) than it was using my R9 380 on Blender 2.93 (2m30s). Even more interesting was it was faster using Linux than Windows even on my desktop computer. I also chose to go with Cycles render engine rather than Eevee. I don't think Eevee is worse than Cycles, it just requires alot more work to achieve about the same effect as the raytracing with cycles it just wasn't worth the effort with the amount of time I had. The tradeoff obviously was I had to wait alot long for rendering. To mitigate this issue I dropped my resolution to 720p instead of 1080px. Alot of time was saved doing that during my tests (approx. 3 times). With that I developed my strategy.
On my desktop PC using Manjaro I animated each shot. When the shot was completed I rendered the first, middle, and last frame in cycles to verify the lighting of the scene was what I desired. Then rendering the entire scene using Eevee as it would only take a couple of minutes compared to an hour of twiddling my thumbs and once I was happy with it I would copy all the files to a USB and have my laptop render the shot while I worked on the next shot. In the event something horrible happened I would render any frames on both computers while I slept. Luckily I never needed to.
These were my render settings:
Cycles
CPU
Max Samples: 500
Noise Threshold: 0.1000
Denoise: OpenImageDenoise
Persistent Data (Everything in memory is shared for each frame improved speed at the cost of RAM)
1280x720p at 24fps

Total Render Time: 9h20m34s
I'm used to After Effects so it didn't take a lot of time at all to assemble the final animation. After Effects has the option to import pngs as entire shots which made my timeline much easier to navigate and insert audio clips. Chose not to do additional color grading as I felt that the lighting was right and didn't want to risk removing the natural color I already rendered. At the end of the animation when Mario burns to death, I use a simple layer mask to use the bowser logo to exit the last shot. A reference to Mario 64 after he loses a life with the trademark laugh from that game as well.
Audio didn't require much work either all clips I used were from existing source material from the games. I found a nice footstep clip that matched my needs however, I still needed some effects like Bowser cracking his neck and Mario clenching his fists at the beginning. Thus, I decided to improvise. I grabbed my $8 microphone in front of me and recorded audio clips like cracking my knuckles or twisting a glove to create those effects. I record a few extra seconds to use as a noise profile to remove any noise from my clips. I was pretty pleased with the result.
There was alot left to be desired for this project even with the constant adjustments throughout on the limitations and monitoring my ambitious ideas. I originally wanted to do 2 scenes more action and cool effects and more models but I reached what I could in a short period. I have my respect for animators who make a living doing this. It is not an easy task and often overlooked how much effort was put into making graphics how they are now. Mario in 1985 could barely hold all its logic and graphics now its on the go on the Switch. I enjoyed working on this love letter to a series I care a lot about. One day I hope I could reach there and look back at this and remembered how much experience I have gained. Maybe even be inclined to do it again...who knows.
Mario - Super Smash Bros. Ultimate - https://www.models-resource.com/nintendo_switch/supersmashbrosultimate/model/28692/
Bowser - Super Smash Bros. Ultimate - https://www.models-resource.com/nintendo_switch/supersmashbrosultimate/model/28695/
Mario Vs. Bowser - Super Mario Brothers - https://www.mariowiki.com/World_8-4_(Super_Mario_Bros.)
Bowser's Logo - Multiple Games - https://villains.fandom.com/wiki/Koopa_Troop
mk64_boo_laugh, mk64_bowser01 - Mario Kart 64 - https://themushroomkingdom.net/media/mk64/wav
sm64_boo, sm64_bowser_laugh, sm64_mario_lets_go, sm64_mario_whoa - Super Mario 64 - https://themushroomkingdom.net/media/sm64/wav
smsunshine_mario_arrivederci, smsunshine_mario_burned_1 - Super Mario Sunshine - https://themushroomkingdom.net/media/smsunshine/wav
Footsteps - https://www.fesliyanstudios.com/royalty-free-sound-effects-download/footsteps-31
Bowser Thud - Super Smash Bros. Brawl - https://www.youtube.com/watch?v=nyormyD_grs&list=PLM1V-RCcVMpH4hZiPYejSLG4CTnlpv_hA&index=3
ssbm_bowser_21 - Super Smash Bros. Melee - https://themushroomkingdom.net/media/ssbm/wav
Ultimate Bowser - Super Mario 64 - https://www.youtube.com/watch?v=SCrCmlrmHqg
Game Over Vs. - Dr. Mario (NES) - https://www.youtube.com/watch?v=tvNLyLTTNwM