COSC 3P98 – ANIMATION PROJECT: Warbird in Flight by George Roglic
Introduction
When
I first began thinking about a concept for this project I imagined creating
some sort of space sci-fi scene with ships flying, lasers firing, explosions -
the whole works. Yet after further planning I came to the conclusion that such
a scene would not be possible within the framework of this particular project.
With only fifteen seconds to work with I decided to scale down my vision to
something simpler yet still as impactfull.
Since
I was so enamored with the television series I decided that I would do a scene
based on Startrek. I was even more so intrigued with the Romulans. There sleek
ships seemed like an attractive object to model. Therefore the Romulan Warbird
became the focus of my scene.
Concept
In the dark recesses of space a Romulan Warbird emerges out of the shadows of a camouflaging nebulae. Thunderous music echoes in the background as it gracefully glides through space – in flight. Then without any warning or prompting it engages it’s cloaking device and fades into the background. What is it doing? Where is it going? Who knows! Perhaps it is preying on an enemy ship and poised to attack it.
Tools
- Modeling/Animation: 3D
Studio MAX R3
- Textures: Adobe
Photoshop 5.5
- Movie Editing: Adobe
Premiere 5.5
- Video Compression:
MPEG4 for AVI
- Audio Compression: none
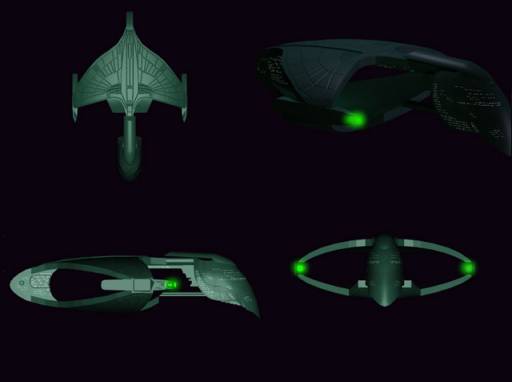
Reference Material
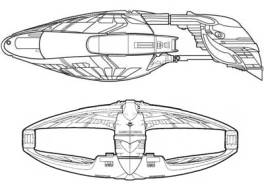
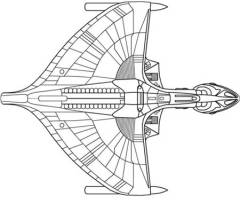
While
perusing the Internet I game across a very good site (Starship Schematic
Database www.shipschematics.net )
that provided me the following schematic diagrams.
Models
To
avoid complexity, I decided to optimize the number of polygons required to form
the model’s mesh so that rendering time could me kept to a minimum. I realized
that in doing so the detail of the model would suffer. Therefore, to enhance
the model’s appearance with more detail, I decided to use bump maps. See
textures heading for more information.
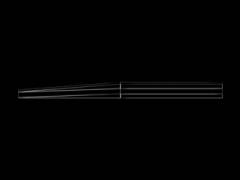
The Romulan Warbird consists of 10 sub-objects, which were strategically pieced together to form the finished model, much like a plastic model kit would. I decided to divide the model into sub-objects simply of the model’s ship. It is such that it would be difficult to apply a single texture and get the desired results. Instead, each sub-object was textured. There is more information on texturing in the next section.
Because the Warbird has an unusual shape I knew modeling would be difficult. Generally, for each sub-object I started by using a simple primitive or using splines to create a simple 3D shape that roughly resembled the sub-object in question. Once I had a starting point to work with, I applied modifiers and Boolean operations to the object until I was satisfied with the shape. Vertex manipulation was kept to a minimum.
Romulan Warbird
· Head – forward most part of ship.
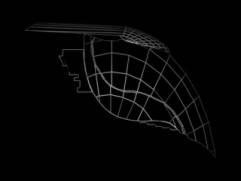
· Top Hull – upper winged portion of ship.
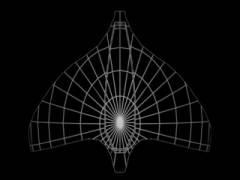
· Bottom Hull – lower winged portion of ship.
· Rear – tail end of ship, also connects the Top and Bottom Hulls.
· Top Axel – upper spine of ship, also connects Top Hull to Head.
· Bottom Axel – lower spine of ship, also connects Bottom Hull to Head.

· Warp Engine – located at the tips of both the Top and Bottom Hulls.
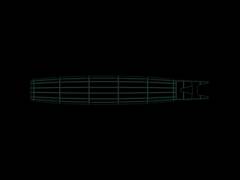
· Warp Glow – located within each of the Warp Engines.
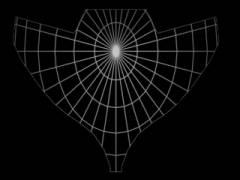
Planet
· Sphere.
Textures
I used textures for two reasons. I wanted them to serve as the skin of the model, but I also wanted them to enhance the detail of the ship though bump maps and glow maps.
To create textures I used rendered images of the models to paint on and modify using Adobe Photoshop 5.5. Then I would crop the textures to the exact size of the model and apply them to the model. Since all the models I made were symmetrical I used planar mapping so that both sides of the object would look the same.
I used the same technique to make bump maps and glow maps. I used bump maps to add some detail, such as the feather design on the top and bottom hull. The glow maps were used to illuminate the windows and lights of the ship.
Planet
· Diffuse map – generated in 3D Studio Max by manipulating Noise parameters to achieve random patterns.
Romulan Warbird
· Head
o Diffuse map
o Glow map
· Top Hull
o Exterior
§ Diffuse map
§ Bump map
o Interior
§ Diffuse map
§ Bump map
· Bottom Hull
o Exterior
§ Diffuse map
§ Bump map
o Interior
§ Diffuse map
§ Bump map
· Top Axel
o Diffuse map
o Glow map
· Bottom Axel
o Diffuse map
o Bump map
· Rear
o Diffuse map
o Bump map
o Glow map
· Warp Engine
o Diffuse map
· Warp Glow
o Diffuse map
Final Result
Effects
· Glow
o The glow effect was added to the Warp Glow object to make the engines look like they are active.
·
Cloaking
o Using a Wave Modifier and attaching it to the ship achieved the cloaking effect. It starts with an initial amplitude of 0 increasing to 200 then decreasing back to 0. These values were tinkered with during the keyframing process. The phase of the waves was set to 3.
o The fading out was achieved by setting a starting visibility value of 1 and then decreasing it to 0 until the ship is no longer visible.
Editing
After I had rendered the three separate scenes into AVI movies, I imported them into Adobe Premiere 5.5 where they were spliced together into one continuous AVI file.
I also used Adobe Premiere to import a WAV file and add it to the final AVI movie.
Soundtrack
Initially I had envisioned using a lot of sound effects. However since I had decided to scale things back I thought it best to drop the sound effects entirely. Instead I went with a thundering music track. To get the full effect I wanted the music to be bold, dark and even military like. After sifting through various sources I stumbled upon the perfect little piece, on a video game called Startrek Armada.
Afterthought
I learned a lot about the process of creating an animation as well as the amount of work and attention to detail that has to be put into it. A few headaches aside, I had a good experience and had a lot of fun. Not surprisingly the most difficult part for me was learning the system and the hundreds of functions, modifiers, operations, and effects that go along with it. I really concentrated on trying to make realistic models, so I spent most of my time fiddling with various modeling techniques until I found a method that I was comfortable with. However, I’m sure that I’ve only scraped the surface of what 3D Studio Max can really do. I did have fun though!