The models used in the animation
include:
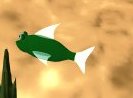 |
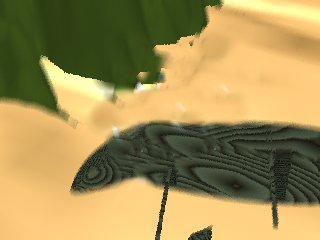
ModelingAll the fish in the scene are made from the same prototype. To make this prototype we began by outlining the basic curvature of the body using the Curve Tool. Outlining just the top half of the body, the entire shape was achieved using the revolve tool giving a circular (sort of bottle shape) that could be squashed and pulled into shape. The mouth was made using a NURBS Spere squeezed into the same eliptic shape as the rest of the fiish. The mouth is merely the start and end sweep of the sphere. In order to distinguish the rear tail, it had to be separated from that rest of the body. We were able to highlight the line and "detach" it from the body so that it could be given a separate colour. The fins were done using NURBS cones. These cones were also squashed and stretched into shape by manipulating the CV's. The eyes were developed through the "Salty Seal" Tutorial. The eye lids were achieved similar to the mouth using NURBS sphere. All the pieces are then grouped together to form a fish and the three small fish are grouped together to form a school. |
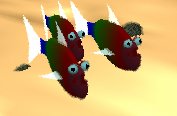 |
TexturingThe small fish are blinn surfaces textured with the rainbow texture found in Maya. The ramp texture was used to modify the U-V direction of the three colours as well as the order and spacing. The mouth is a phong surface with a redish colour attached.and the fins and tail are phaong surfaces with white semi-transparent colouring.The big fish body, mouth and eyelids are also a blinn surface with a green colouring attached. The eyes on both fish were textured using a phong surface with a black and white ramp texture applied. |
AnimationBoth fish are set to follow a motion path drawn using the curve tool. The path was manipulated with the CV's to intersect with each other so to give the effect of the little fish being swollowed up by the big fish. The loops and up and down motion was also achieved by manipulating the CV's.The big fish also has a tail that swings back and forth while it is swimmig. In order to achieve this three joint skeleton was bound to the skin of the fish. The second to end joint was then rotated a few degrees every 20 frames and the key was set. Surprisingly the joint of the fish does not follow along on the motion path with the big fish but remains stationary from beginning to end ( other than the constant swaying of the tail joint) |
 |
|
|
|
|
|
|
|
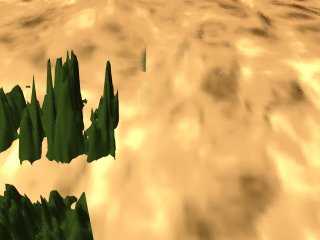
Camera 1: This camera gives an overall perspective of the scene. It remains in this position for the first few frames of the movie. Its main focus however is on the big fish.and views it for the first 192 frames.
Camera 2: Is a camera that starts form a overall perspective view and pans around and zooms in on the school of fish. The focal point of this camera is set to follow the same motion path of the fish. This allows the ability to move the camera to any position and still have the focus remain on the fish at any frame during the animation. For the final render the camera views the small fish as they come around the first mountain and pans in for an up close view as the pass by the sunnken ship. This camera is also used near the end when the small fish come upon their attacker
Camera 3: This camera angle is set highup an gives a panaorama view of the whole scene. This view is used after the pass by of the fish to show the big fish circling to meet up with his catch.
Camera 4: The "Fish Cam" is grouped with the small
fish and follows the motion path along with them. It gives a view that
the fish have as they are giong through the scene. It is used right at
the end when the fish are being attacked by the big fish. The way the motion
paths intersect, the "fish cam" makes a path right inside the big
fish transportiing the scene into darkness.
 |
This page is: |