COSC 3P98 – Animation Project
“Blown
Away”
By: Mike Watson & Greg Ankersmit
Introduction
Our
main goal when attempting this project was to capture the effect of a movie scene
using different camera views. In doing
this, we were able to achieve high speeds of the rockets and show the different
perspectives of each rocket. Our
initial concept was to simply have two rockets start at either end of the
mountain, fly through the mountains, and somehow find each other at the end for
a large explosion. We refined this idea
by having the two rockets starting at the same position and simulate a race
between the two rockets. In the end the rockets come around a bend and meet
each other in the middle of a passage way for the final explosion.
Using Maya 3.0
Since
Maya is an extremely complicated program, we had to decide what was going to be
important for the scene we wanted and focus on those aspects. We decided to minimize the amount of time
spent modeling complex objects and focus more on the paths the rockets took and
positioning cameras in the right places to achieve a realistic animation. We also focused on using dynamics to create
the final explosion as well as the trail of smoke behind the rockets.
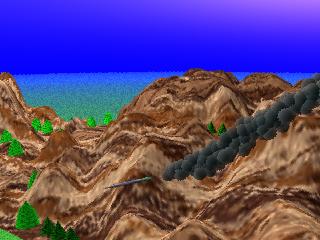
Creating the Setting
Mountains – The Mountains were
created using Bryce 4.0. Bryce is a
very useful program when creating terrains and mountain objects. We modeled our mountains in Bryce and set
the texture we wanted on the mountains. When we were finished, the mountains
were exported from Bryce as object files.
The different textures were saved as “tiff” files. The mountains could then be easily imported
into Maya as an object to be used in our animation. The textures had to be converted in XV into bitmap files. This was the only way we were able to apply
the textures on the mountains.

Backdrop – The effect of a ground and sky were simulated by attaching an image plane to the back of the cameras instead of actually creating a sky in our scene. The image plane would only be displayed behind all of our concrete objects in each frame so our objects would not be covered up. This worked our well because the image plane distance and floor settings could be altered in our scene as desired. Also, the image plane was an entire scene in itself. It had a sun and clouds. This way, we wouldn’t have the same static background behind every frame in our animation.
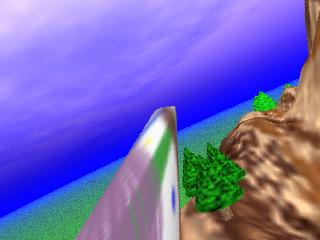
Rocket – The rocket was
modeled very easily be changing the CV’s on a cylinder and applying a texture.
Trees – The trees were also modeled easily by modifying cones and cylinders, then applying textures to the trees.
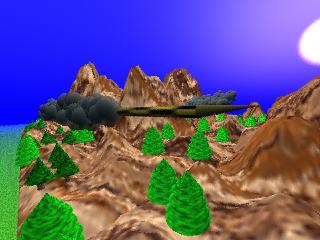
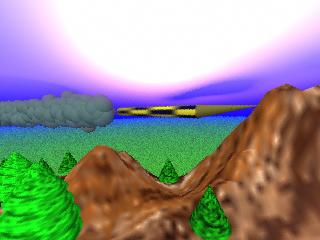
Lighting
All of the lighting in our scene was achieved through the use of our sun. The sun was created using an image plane on our cameras. Therefore, the sun was not actually an object in our scene. We were able to alter the attributes of the sun in order to change the setting of the sun in the sky, the brightness of the sun as well as the intensity and azimuth of the sun. We were also able to set the contrast and intensity of the clouds and the color of the sky. This allowed us to set the mood and the time of day. The elevation of the sun directly affects the amount of light distributed in the scene. Having the sun directly at the top of the scene will emit the most amount of light. We set the sun to be low above the horizon, giving the effect of an early evening setting. The above picture is a good example of the sky and the elevation of the sun.
Animation
Our animation was achieved by creating paths throughout the mountain ranges. We created the paths using the “EP curve tool”. First, we simply plotted the points and the general direction of the paths over the mountain range from a top view of the scene. Then we were able to raise the elevation of the entire path using a side view of the scene. In order to make the paths run properly through the mountains and have variable elevation levels, we had to adjust the control vertices of the paths individually. We had to be careful and make sure that the paths did not run through the mountains. After the paths were set, we were easily able to attach the rockets to the paths. In order to have the rockets maintain a proper orientation along the path, the “follow” constraint option in the “attach to path” function had to be turned on.
The next task was to set up the cameras properly on the rockets. We had a total of five different cameras that were used for filming throughout our scene. We were then able to take cuts from each of the cameras to piece together our animation. All of our cameras were created using two nodes. We had two cameras on each rocket at all times, and an extra camera present in order to take still shots of the rockets at various points in their paths. The cameras that were oriented on the rockets were attached to the paths in a similar manner to the rockets. Each rocket had a camera positioned on top of it to give a view of the rockets perspective. Also, each rocket had a camera following it just off to the side to capture an overall picture of the rocket and the scene.

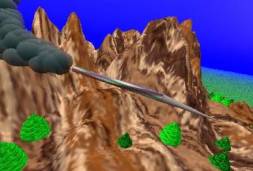
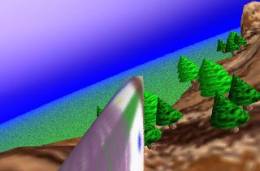
Stationary
Camera Side
View Camera Rocket
View Camera
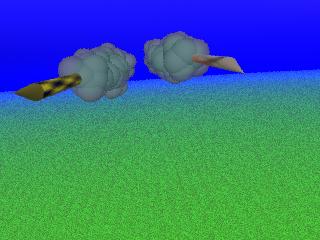
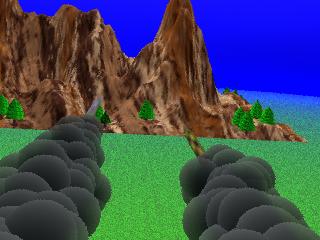
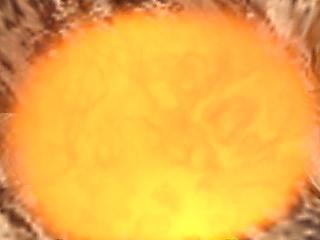
Dynamics
The
fireball and trailing smoke behind the rockets were created using
dynamics. For the smoke, we created a
smoke emitter that was attached to the back control vertices of the rockets. Once the emitters were in place, we had to
alter the settings of the smoke to achieve a trail. The type of particles that were used for the smoke trail are
called “cloud” particles. The
proper direction of the smoke particles were set as well as other attributes
such as the “lifespan” of the particles, the “thickness” of the
particles, and the “level of detail”.
For
the fireball at the end of the scene, we just attached a fire emitter to one of
the rockets. While the rockets were
flying along their path, we had the dynamics of the fire turned off so that we
wouldn’t see any fire. The fire was
disabled by turning “is Dynamic” off.
When the rockets were just about to collide at the end of the scene, we
turned the dynamics back on. The fire
was disabled an enabled by setting keys in the animation sequence. At frame 1 a key is set to have the fire
turned off, and at the end of the scene another key is set to turn the fire
back on. In order to achieve a large
fireball, we had to increase most of the attributes of the fire such as “level
of detail”, “lifespan”, “scale”, “speed”, “direction”,
“spread”, “turbulence”, “density” and “start and end
radius”. We set a camera to look
down on the explosion and zoom in as the explosion increased. Each frame of the explosion took approximately
20 minutes to render.
Post
Production
After
we had rendered all of our frames using Maya, our post-production work
began. The first tool that we used was
the Media Convert package on the SGI machines.
We loaded all the frames for a particular camera shot (scene) into Media
Convert. We then had the program
combine the frames into an uncompressed Quicktime movie format. After we had all of our scenes made into
Quicktime movies the post-production moved to the Movie Maker program. In Movie Maker we imported all of our
uncompressed Quicktime movies into the work environment. At this point all of the scenes play
consecutively and you can get a good idea of how your movie will look.
After
we were satisfied with the order and playback of our movie, we created
beginning and end credits using the “Create Title” menu option in Movie
Maker. Then using the graphical time
slider at the bottom of the screen we simply dragged our start and end credits
to the appropriate time in the scene.
The final piece that needed to be added now was sound. We used two sound clips in our movie. The first is the sound of an afterburner as
it approaches and flies by, which we used for the first two scenes where the
rockets fly by the stationary camera.
The second sound file used was a fifteen second .wav excerpt from the
AC/DC song TNT that plays throughout the rest of the movie. We felt that the tempo and lyrics in this
clip fit very well with the flight and subsequent explosion of the two
rockets. Adding the sound to the movie
was very easy to do using the Movie Maker.
It was as simple as importing the sound files into the work
environment. Using the time slider’s
graphical representation of the .wav files, we moved them so that they began
and played in a good synch with the movie being shown.
Once
all the components of our assignment were placed in the right order, we used
the ”Export As…” command to make our movie. We chose to make our movie a Quicktime movie using Cinepak compression
set to 75% to greatly reduce the size of our finished product.
Impressions
We
found Maya to be a powerful but at times confusing package. The shear multitude of options and
attributes for objects that can be set and changed at times was a little
overwhelming. Originally we had planned
to have a scene of an eagle perched on top of a mountain. The eagle would take off and fly around the
mountain. Then it would spot a rabbit
on the ground and swoop down and catch the rabbit only to return to his perch
to eat his prey. Shortly after doing a
few tutorials in Maya, we quickly realized that our goal of having a realistic
eagle in a scene would involve much more time and artistic talent than either
of us had available.
The
scene we chose was a more realistic goal for us to achieve given the time
constraint with our project. We are
happy with the way that our final product looks. However, the hardest part of the assignment was doing everything
for the first time. Knowing what we
know now, we could do many different things with Maya and expand on our
project. Overall it was a fun project
to work on and it has opened up a whole new perspective in Computer Science.