BY
© MICHAEL MONTEAN & RYAN KUO
STORY
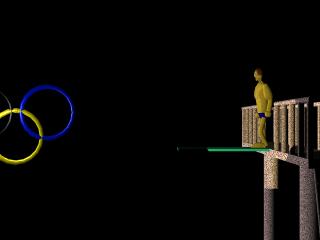
It starts out with a spot light moving around the olympic
rings in a room that has no lights. A flaming arrow then is seen
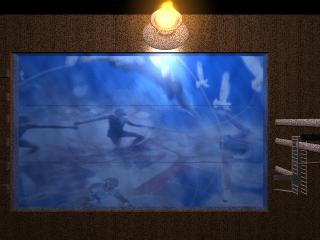
racing towards the camera heading towards the big torch. The torch
is lit and lightens the room. The room is actually an olympic pool
with high diving boards. At the top is the olympic diver. The
camera starts at the base of the tower and moves up to the top, where the
diver is located. Once the camera reaches the top, the diver bows
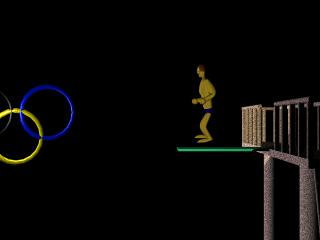
for the camera and is ready to take the plunge. He walks towards
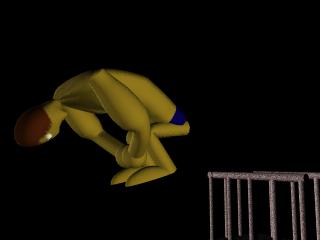
the end of the board takes a jump and springs into the air. He gets
into the tuck position, and at this point he gets frozen in that position
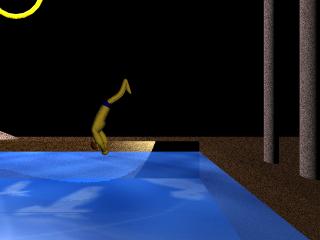
while a camera circles around him. Then he plunges downwards doing
3 1/2 flips before he dives into the pool. He comes to the surface
and waves to the camera. The camera then goes back to the flaming
torch from the beginning, and the fire dies down to nothing to end the
animation.
PRODUCTION PROCESS
MODELING:
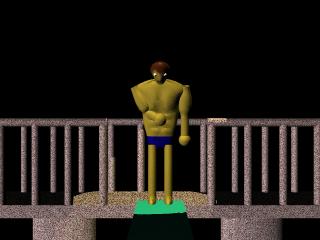
diver: (created by Michael Montean)
The diver was created using 4 cylinders, 4 spheres and
two half spheres. The 4 cylinders were used for the arms and the
legs. 2 half spheres were used for the feet, and the 4 spheres were
used to create the body the head and the 2 hands. This was the most
tedious part of the modeling process in creating the diver. Many
extra isoparms had to be inserted into the spheres to be able to create
the chest and the stomach muscles on the diver. After 3 days of working,
finally he was completed. Bones were used inside to make the diver
walk, jump and flip. The arms had to have special flexors on them
to create the biceps. As the diver walks, the arms move and the muscles
bulge. It is hard to see since the camera is back a ways from the
diver in this scene. The arms and the legs were taken from the tutorial
primitive man in the Maya 2 book. 2 scripts were made to make sure
when the diver walked that the feet would bend properly at the ball of
the foot. The tutorial had the scripts but I had to alter them because
the diver was facing the opposite direction that the primitive man was
facing. In the spine of the diver, the IK spline handle was used
so that there was a smooth curve when the diver had to get into the tuck
position. Regular IK handle's were used for the arms and the legs.
The head of the diver was formed somewhat like the body. I needed
to use extra isoparms to create a nose and neck. I found out
later that I should have made indents for the eye sockets because when
the camera circles around the diver in the tuck position, you can see how
much the eyes bulge out of his head. To make the eyes, a V ramp was
used with black, blue and white colours applied. To get the hair
I made a texture in VizPaint2D3.3
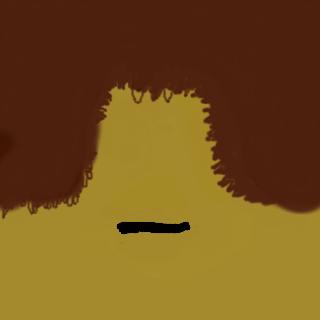
This was a bit tedious at times. Had to make sure
the hair would fit in the right spots on the side of his head. Had
the most problems with trying to orient the mouth in the right spot.
the scene: (created by Ryan Kuo)
The diving platform is created using basic 3D primitives
such as cylinders, cubes, and planes. Those primitives are scaled
to form various parts of the platform. I used marble texture on the
platform. The water is made of a 2D plane and the texture is water
texture. The pool bottom is made of 3 2D planes and the planes are
grouped together. The 3 textures were obtained from www.olympic.org
and applied to the three corresponding planes. The torch is made
by a curve and was revolved around the y-axis. The arrow was basically
a cylinder and a cone. The olympic rings consist of 5 torus's.
The names were just made with the text tool in Maya.
ANIMATION
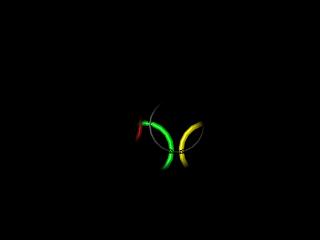
INTRODUCTION:
The introduction consists of a spot light moving about using a locator which is behind the rings on a fixed path.
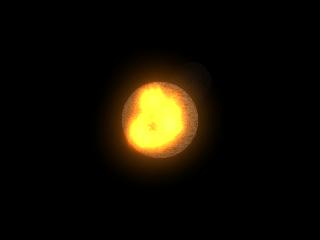
LIGHTING OF THE TORCH:
When trying to attach the fire to the head of the arrow,
it would flame up on the cylinder instead of our desired effect.
So to get over this complication, a transparent sphere was placed in front
of the arrow at a specific location and flames were attached to the sphere.
This created the look we had intended.
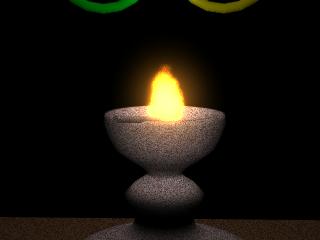
To light up the arrow, the fire intensity, scale, life
span, and fire turbulence had to be key framed from no fire to a lit arrow.
Because the fire does not provide any light to the scene a spot light had
to be aimed at the arrow head and animated with the arrow. A camera
had to be located approximately half way between the torch and the arrows
path. The camera's focal length was animated so that the arrow would
fit into the picture. The same idea to light the torch was used.
A spot light was animated in the upward direction to simulate the fire
intensity as it grows and to provide light for the olympic rings.
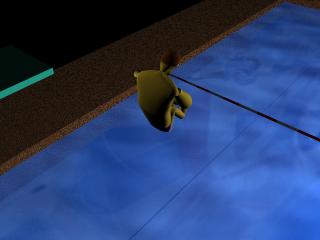
POOL:
This scene is a transition scene from the opening scene to the diver on the board. Camera was moved to show the bottom of the pool. We animated the transparency of the water in order to see the bottom of the pool.
DIVER BOW:
The diver bow is both a camera animated as well as the diver. The camera starts at the base of the tower and moves upwards to the top, then zooming in to the diver. The divers IK spline handle was key framed and moved ahead in order for him to bend over. To move the arm, the shoulder joints and the elbow joints had to be rotated about their axis and key framed. We tried using the IK handles created on the arms, but couldn't rotate the elbow joint when using this method. A spot light is turned on the diver when he begins to bow.
WALKING ON THE DIVING BOARD:
This part of the animation became a frustration at times. To get the effect of walking the pelvis joint was selected and moved to the end of the diving board, leaving the feet handles at the start. Then, to key frame the leg movement in a sliding fashion, the animation was started at the 1st frame and slowly frame by frame the body would move forward. When a desired frame was reached, we put one leg in front of the body, keyed it and left the other in it's position keying it as well. This was continued until the diver was almost at the end of the board. We had to set a frame for the pelvis joint once again in this position, and then moved it upwards to a desired height, and at approximately half way from the start of the jump to the finish it was keyed. Then, to make the feet lift off the ground for each step this same process had to be established once again. Putting the scene back to frame one, we moved frame by frame until the leg was about center of its movement, lifting the leg and setting it's position. Once again to make the arms move, we had to start at frame one repeating the same process. As the left leg would move forward, we would move the right arm forward and the left arm back and vice versa for the right leg. At the start of the jump, the divers pelvis had to be lowered in order to get a bending at the knees moving the entire diver downwards. Then lifting off for the jump, the diver bends up one knee, and goes off with his toes on the other leg. Both arms are thrust backwards using the IK handles on the arms. This as well uses a flexor on the biceps which is animated at the same time, bulging the muscles in his biceps when the arm is raised.
FLIPPING AND DIVE:
This part we found difficult, especially when trying to
render the final scenes. Every time we would go to render we would
find out the divers arms were rotated the wrong way and out of control.
Finally after 5 try's we figured out that the IK handles hadn't been grouped
together with the diver and the rest of his structure creating the random
location of the arms. During the process of animation we were trying
to figure out how to actually rotate the entire diver after making his
tuck. We would like to thank Tony Abou-Assalah for his idea of grouping
the entire diver and his bones together in order to get the flipping action
we desired. This took a couple days to finally put together and we
were beginning to think we might have to make the diver do a cannon ball
instead.
The frames were then set for the divers elbows, shoulders,
IK handles, and IK spline handle at the last flip. We set the appropriate
frame putting him in the dive position using the handles and rotations
for elbows and shoulders.
ENDING:
The diver waves to the camera using a key frame on the elbow joint and rotating it on the z-axis. Camera is animated to the torch once again and key frames are set on the lights as well as the fire. The fire goes out with the lights making the scene dark once again. In the final credits, the rings were made transparent and we animated the transparency to bring the rings into view. The cone angle of the spot light was animated as well to create a circular fade in and fade out.

TOOLS USED
Maya 2.0 - animation's and modeling
MovieMaker - pieced scenes together
and made them into a movie file
MediaConvert - change rendered
frames into quicktime
SoundEditor - changing format of
wave file
VizPaint2D3.3 - used for painted
texture
MediaPlayer - for viewing the animation
CONCLUSION
We found that Maya 2.0 was a very
powerful tool, not only in modeling, but also in animating. We found
it interesting that a bone structure could be incorporated into a model
in order to give it a realistic appearance when moving the model.
Our first thoughts for the movie was to make it very simple because of
the time factor, but as we got into it more and more, we ended up making
a more complex final product. Our initial plan was to have a diver at
the top and just to make him do flips and dive into the pool. But
as time went on, we continued to get more and more idea's, finally ending
in this final product. It has satisfied us greatly to see the
results. Even though there were many frustrations in piecing it all
together, we still think that doing an animation instead of an essay is
the way to go.
